-- PedroRio - 17 Jan 2011
 Figure LibViewers.1 - The preview of the viewer generated by scaffoling to edit a LIB_Book instance
As you can see in figure LibViewers.1, the attributes of a book are all displayed one beneath the other, and collection attributes are displayed as tabs. The general structure of this viewer is the following:
Figure LibViewers.1 - The preview of the viewer generated by scaffoling to edit a LIB_Book instance
As you can see in figure LibViewers.1, the attributes of a book are all displayed one beneath the other, and collection attributes are displayed as tabs. The general structure of this viewer is the following:  Figure LibViewers.2 - Preview of the final result desired for the first tab (General)
And the "Additional Information" tab will be like the one depicted in figure LibViewers.3
Figure LibViewers.2 - Preview of the final result desired for the first tab (General)
And the "Additional Information" tab will be like the one depicted in figure LibViewers.3
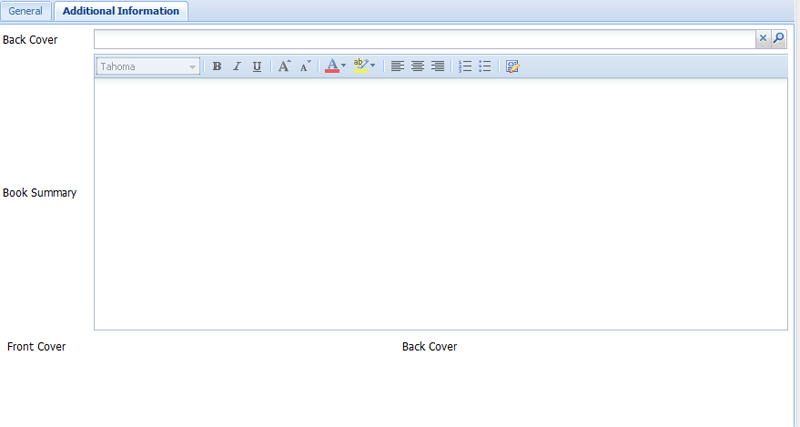
 Figure LibViewers.3 - Preview of the final result desired for the second tab (Additional Information)
 Figure LibViewers.4 - Preview of the LIB_Book edit viewer in XEO Studio
Next you'll make creative use of the xvw:rows component in order to put the book fields in the left side of the viewer and an image of the book cover in the right side. You can imagine the xvw:rows component like a table, with several rows and columns. To achieve the desired effect you'll need to create a xvw:rows component with one row and two (side-by-side) cells. The first cell will contain the all the attributes to fill and the second cell will have the book cover image. The trick to maintaining the structure is reuse another xvw:rows component in the first cell and second cell (to make them side by side).
So the structure will be like the following for the "General" tab:
Figure LibViewers.4 - Preview of the LIB_Book edit viewer in XEO Studio
Next you'll make creative use of the xvw:rows component in order to put the book fields in the left side of the viewer and an image of the book cover in the right side. You can imagine the xvw:rows component like a table, with several rows and columns. To achieve the desired effect you'll need to create a xvw:rows component with one row and two (side-by-side) cells. The first cell will contain the all the attributes to fill and the second cell will have the book cover image. The trick to maintaining the structure is reuse another xvw:rows component in the first cell and second cell (to make them side by side).
So the structure will be like the following for the "General" tab:
XEO Library Viewers
In the previous chapter you created the list/edit/lookup viewers for the LIB_Author Object Model (without the need to create a specific Java Bean to implement custom behavior). In this chapter you'll create the remaining viewers and the respective Java Beans (when necessary) to implement custom behavior. The first step to speedup the viewer creation is using XEO Studio's scaffolding tool as before to generate the basic structure for most of the viewers. Again, go to the "XEO Studio" menu, choose "Utilities" -> "XEO Scaffolding", press ok to skip the warning and choose the LIB$1.0 Package from the list (if you had already customized the Author viewers you would have to be careful not to choose that Object Model, because Scaffoling overrides existing viewers) If you do that, you'll have one folder for each Object Model created inside the webapps/default/viewers folder. (Entries added to the Main.xvw viewer?). For now let's create a new entry in the Main_Library.xvw viewer for the list of books. Just like in the previous chapter, add the following entry to the Main_Library.xvw, right bellow the entry for the list of authors:<xvw:menu text='Books'
value="{viewerName:'LIB_Book/list.xvw', boql:select LIB_Book}"
target='Tab' serverAction="#{viewBean.listObject}" />
You can leave the list viewer, for now, this part we'll focus on the edit viewer of. XEO Studio's Scaffoling will have generated an edit viewer that should look like depicted in figure LibViewers.1
Figure LibViewers.1 - The preview of the viewer generated by scaffoling to edit a LIB_Book instance
As you can see in figure LibViewers.1, the attributes of a book are all displayed one beneath the other, and collection attributes are displayed as tabs. The general structure of this viewer is the following: - xeo:formEdit
- xvw:rows
- xvw:row and xvw:cell per xvw:attribute
- xvw:tabs
- xvw:tab with xeo:bridge component
- xvw:tab with xeo:bridge component
- xvw:rows
Figure LibViewers.2 - Preview of the final result desired for the first tab (General)
And the "Additional Information" tab will be like the one depicted in figure LibViewers.3
Figure LibViewers.3 - Preview of the final result desired for the second tab (Additional Information)
Building the viewer step-by-step
In order to give you a more in-depth view of composing a viewer, we'll create it step-by-step. First, start by removing all of the content generated by the Scaffolding tool (except the basic components xvw:root, xvw:viewer and xeo:formEdit). And a tab a xvw:tabs component (a tab container) under the xeo:formEdit. As child elements of the xvw:tabs component, add two xvw:tab components (actual tabs) add the label property to each of them ("General" to the first and "Additonal Information" to the second), the viewer definition should be like the following:<xvw:root xmlns:xvw="http://www.netgest.net/xeo/xvw" xmlns:xeo="http://www.netgest.net/xeo/xeo">
<xvw:viewer beanClass="netgest.bo.xwc.xeo.beans.XEOEditBean" beanId="viewBean">
<xeo:formEdit>
<xvw:tabs>
<xvw:tab label='General'></xvw:tab>
<xvw:tab label='Additional Information'></xvw:tab>
</xvw:tabs>
</xeo:formEdit>
</xvw:viewer>
</xvw:root>
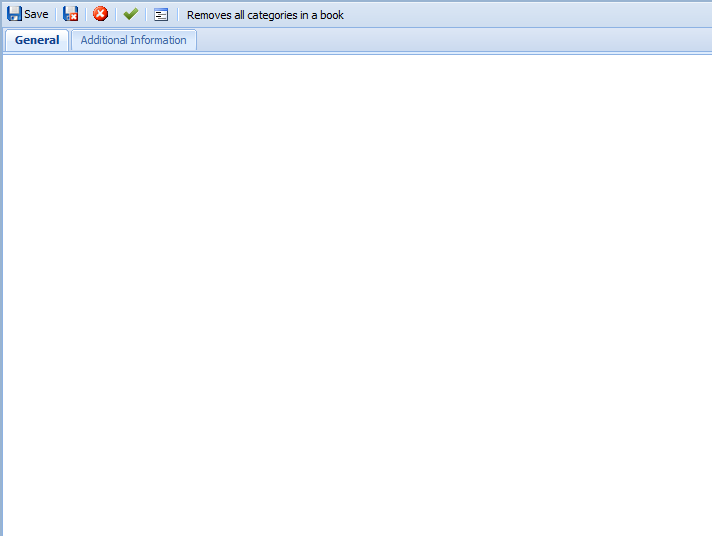
Use the built-in preview (remember to launch the project before) in XEO Studio to check the result. It will be like the one depicted in figure LibViewers.4.
Figure LibViewers.4 - Preview of the LIB_Book edit viewer in XEO Studio
Next you'll make creative use of the xvw:rows component in order to put the book fields in the left side of the viewer and an image of the book cover in the right side. You can imagine the xvw:rows component like a table, with several rows and columns. To achieve the desired effect you'll need to create a xvw:rows component with one row and two (side-by-side) cells. The first cell will contain the all the attributes to fill and the second cell will have the book cover image. The trick to maintaining the structure is reuse another xvw:rows component in the first cell and second cell (to make them side by side).
So the structure will be like the following for the "General" tab:
<xvw:tab label='General'>
                    <xvw:rows>
                        <xvw:row>
                            <xvw:cell><!-- Book fields will be here --></xvw:cell>
                            <xvw:cell><!-- Book cover  will be here --></xvw:cell>
                        </xvw:row>
                    </xvw:rows>
</xvw:tab>
Previewing in XEO Studio will not produce any result as the xvw:rows, xvw:row and xvw:cell components to not have any visible visual representation. To put the book fields in the first cell, use the following code:
a
a
a
a
a 

| I | Attachment | Action | Size | Date | Who | Comment |
|---|---|---|---|---|---|---|
| |
LIBBookScaffolding.png | manage | 15.1 K | 2011-01-18 - 14:07 | PedroRio | |
| |
LibBook2ndTab.png | manage | 21.2 K | 2011-01-18 - 14:25 | PedroRio | |
| |
LibBookFinal.png | manage | 41.4 K | 2011-01-18 - 14:23 | PedroRio | |
| |
LibBookFinalTabs.png | manage | 8.1 K | 2011-01-18 - 14:54 | PedroRio |
XEO Primer
- - Instalation
- - Introduction
- - Concepts
- - Architecture
- - XEO Library
- - Deploy to EAR
- - PreferenceStore
- - XEO Model Reference
- - Security
- - Java API
- - BOL
- - XEOQL (BOQL)
- - Administrating
- - Background Tasks
- - boConfig.xml
- - Web.xml
- - Known Issues
- - XEO Flags
- - Web Components
- - Java Samples
- - Custom Components
- - Component Plugins
- - Internationalization
- - Viewer Events
- - Value Change Listeners
- - XUIServlet
- - XeoLocalization
- - XvwTemplates
No permission to view TWiki.WebTopBar